I was so excited, I ordered my very first cutting machine on Black Friday from Silhouette. I got the Cameo at a nice discounted Black Friday price! I was so excited for it to arrive because of all of the fabulous projects I saw out in blogland that I could not wait to try!!
Once it arrived I was sort of at a stand still, what would be my first project?? So many things to make, so little time, and to be honest the machine was a bit intimidating! And I am a crafty (previously worked for a major Crafting company), creative AND computer literate person! (I have a minor in Computer Science - little known, un-shared, nerdy fact about me!!)
I have now used my Silhouette Cameo a few times, so I am by no means an expert, and I still have no clue what would be a GOOD first timer project... Maybe printing some nice Holiday gift tags or something nice and easy with cardstock, because the manual you get with your Cameo does a nice job of explaining how to cut with cardstock. But I decided my first project would be to make a canvas vinyl board, because lets be honest that's why you get the Silhouette Cameo or any cutting machine in the first place!!!
I decided with help from my sister to make a board with the saying "Have yourself a Merry Little Christmas". I designed it in Silhouette Studio (the easy part, and again pretty detailed in the start up manual information.
Then came the hard part, cutting the vinyl. I think I now have it all figured out, but it took WAY too much time, that I don't have with a toddler running around the house!
Setting up the Silhouette
First a huge step I missed for the longest time: Adjusting the Rollers for Smaller Media. I figured I was cutting 12" vinyl, I did not have to do any adjusting, but yes you do. The machine comes set up for cutting 13" to adjust for the extra inch on the cutting mat! So refer to page 8 of the Getting started with your silhouette Cameo to see how to do this.

Loading the vinyl takes a bit of adjusting because I always seem to get it bunched up a bit, so I have found starting with a straight cut helps. Line the vinyl up to the rollers and on your control panel of your Cameo use the arrow to select down to Load Media. Then hit the enter key on your Cameo. Make sure the vinyl is straight within the rollers as well.

Then follow the directions on cutting with your machine within the silhouette studio and HOPEFULLY it should cut your vinyl! Make sure to un-select cutting mat so it adjusts for the lack of thickness of the cutting mat. It says to use a blade thickness of 1, but I found 2 works better. I was having trouble with my blade not cutting well so maybe now that the new one is broken in a bit I will switch it back to 1 to see if it still works well.
Even after I thought I had this all figured out it still doesn't work perfectly. I was cutting a longer saying, and half way through it just stopped cutting it. I am not sure why but I finally got my saying cut after a few tries.
In my several communications to Silhouette I suggested they revise their printed materials that are included with the machine. So hopefully they listen to my suggestion, because this was really frustrating to figure out! They were very helpful, but I feel that if I am trying to do something that my product is advertised to do and I need to call the help line to figure out how to do it, there is a problem.
Like I said not an expert, and maybe I should have become an expert on cutting paper before trying vinyl... I cringe to think about how much fun cutting fabric or other different media is going to be!! But hopefully this can help someone else not waste and entire new role of vinyl trying to figure this out!!!
I am still working on the finishing touches of my first Silhouette Cameo project and will post it when it is finished!
Was this helpful, did I miss something important?
A FEW MORE THINGS - Added Feb. 1
So I have had my Cameo for 2 months now, and I am still by no means an expert!! I still have had times where I completely messed up my project using vinyl.
A few things I have learned:
- Go and buy some contact paper from the store. I bought a clear roll from Target for something like 5 bucks. I just recently did this, and should have a while ago since so far I have only used vinyl as a stencil and throw it away. The contact paper has worked just as well and is much cheaper!! NOTE: make sure to put the right side up when you cut it, I didn't the first time and had to do another round of cutting! Opps...
- Buy Freezer Paper! I still have not done this, but its supposed to work really well as a stencil on fabric! I have used vinyl on fabric before. The first time it worked REALLY well. The second time not so well... Google the Freezer Paper idea and check it out. AGAIN a money saver and you are not wasting your expensive vinyl.
- Don't try and cut a "skinny" font! I tried to cut a very fancy, scroll font and it tore the entire thing. Maybe there is a way to cut a thin scroll font with vinyl... but I have yet to figure that out... and again wasted some precious vinyl!
- Smaller sections work better than one large section. Pretty self explanatory!
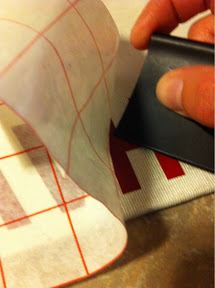
- Sometimes the transfer paper just doesn't help!! I am starting to find that if you are using the vinyl as a stencil it almost works better to not use the transfer paper and to just lift the vinyl from the backing and re-position it by hand on your background. Be careful not too stick the pieces together... and again the smaller sections work better.
That's all I have for now.... here's to fabulous projects with the Silhouette Cameo!
See all of the projects I have made using my
Silhouette Cameo here.