Wednesday, February 17, 2016

Organized Hall Closet

One of the last things you tackle when moving into a new house is the closets! People usually don't randomly look into them, so why bother. Well I finally tackled my upstairs hall closet. My before..... 


This is a fairly nice sized hall closet, well at least compared to the last two hall closets we have had! I showed the hall closet from our last house here. While it was much longer, it was SO shallow. You could barely put a bin in it because of it being shallow and with the supports.

Look at all of the stuff I took out of there!! This is a massive pile of stuff we don't need. For some reason I had 25 pillow cases and about 10 unneeded and crappy bath towels! I also moved all of the kids towels into their bathroom in an empty cabinet.


And the after!!!! AHHH so much prettier and so much more organized!!! AND I have so much more space for additional organized bins and what nots!! 
 It's amazing how much prettier a space looks when its not over crowded and with pretty bins!!!


Tuesday, February 16, 2016

Industrial Laundry Room Make Over

I give you my new and fabulous Laundry Room!!! 

I am so excited about this room!!! First off, in my past two houses, our laundry room has always been way down in the unfinished part of the basement. I hated carrying big laundry baskets down two full flights of stairs just to do laundry. So when we built our house, I was so excited for our laundry room to be upstairs on the same floor as our bedrooms!!!! This has made my life so much easier!

I give you my before, this is what it looked like when we moved in. "Standard" according to the builder would have been a wire shelf across the wall, I asked the builder to not add that, which gave us a nice little credit and a blank space to work with.
 I thought and procrastinated about this space for a long time. Cabinets would have been nice, but cost money. As you may remember last year I made Industrial Shelves for our basement using galvanized pipes. I was not completely happy with how my shelves turned out, and we currently have an unfinished, chaotic basement. So I decided to tear apart my Industrial shelves and hang them up for FREE laundry room shelves!!!! (Free because I already had the stuff!!)

I was so NERVOUS about attempting this project. It would either turn out AMAZING or be a huge huge fail.
It was actually fairly simple project once I got the nerve to do it!!

I used

  • 8 floor flanges which I had previously spray painted bronze
  • 8 - 12 in pipes which I had previously spray painted bronze
  • 6 foot board which I previously stained
  • screw
  • level
  • drill and screw driver
Assembly is easy, find a stud (each floor flange has at least 2 screws into a stud) and attach the floor flange to the wall, and then screw in a pipe. Using a level repeat until you are done!!! See, so easy, why was I nervous about this project????


It is amazing how much different this room looks now!
I am so glad I tore apart my shelves that I wasn't feeling and created something I love and is VERY useful!!
 I love this photo! It was taken by my grandma :)


The laundry room is right between my kids bedrooms, so a lot of times they just throw their dirty laundry right into the washing machine!  And I love that I have a window!! It is such a fun place to do laundry, and so convenient that I do at least one load of laundry a day!!

Friday, February 12, 2016

Best Adhesive for DIY Wedding Pocket Invitations

I can't believe my youngest sister is getting married in a couple months!!! I have three sisters and this is the last of my sisters to get married!! While it is a very very exciting time, its also a little sad its the last of my sister's weddings! Because sister's weddings are so much fun!!! 

A few weeks ago my sisters and mom got together to assemble the awesome invites my sister designed for her wedding. Aren't the cute! Her colors are navy and gold!! (Two colors I myself am currently obsessed with!!) 

 When preparing for our get together we questioned what was the best adhesive to make pocket wedding invitations. We tried a couple different options but decided adhesive dots where the best solution! They were easy to assemble and created a secure pocket!  
 The dots work perfect for adding the invitation to the front of the pocket invite.
And stretching a glue dot the entire length of the pocket holds the pocket perfectly in place. It is narrow enough that the contents of the pocket fit in perfectly.  It also creates a secure pocket so your contents stay in place!!
I just got my invitation in the mail and it looks perfect! I can't wait for her wedding and I am sure you will see more of it as her wedding gets closer! 

Saturday, February 6, 2016

Frozen Inspired Birthday Party

I blinked, and now my little girl is suddenly 3! I am not sure how this happened! 

Well like most little girls, my little girl is Frozen obsessed! So when it came time to pick out a theme for her party she picked Frozen! With a February birthday, a winter theme is the perfect theme! As you may remember she had a Pink and Gold Winter Wonderland party

I love the sweets table! I love creating food for the sweets table! I made both chocolate covered Oreo's and Cake Pops.

What frozen party is complete without ice skates! My almost 6 year old son plays hockey, so of course my daughter wanting to be exactly like her big brother can't wait to play hockey. She just started skating lessons and loves them!
Her own mini cake! She was very excited about her little cake!


Her Happy Birthday Banner! For some reason this looks great in person, but did not photo well!!

I LOVE this tulle table skirt! It is amazing! I was tempted to make an adult sized tutu instead of the table skirt, but decided my original plan was best!

After the sweets table, I love putting together the kids table! The kids always find it fun to drink out of the special glass milk jars!
I made wands for each of the kids! They were so easy to make! And the kids loved them!

While making the tutu table skirt, my son thought it would be awesome on the back of a chair, so I dazzled up the birthday girl's chair!
 What Frozen winter party is complete without a hot chocolate bar!!!!
For toppings we had caramel bits, mint candies, white chocolate chips, marshmallows, chocolate covered marshmallows and chocolate spoon stir sticks.
Did you guess we were having a Frozen party when I gave tips on making chocolate covered marhsmallows and chocolate stir spoons?

And finally I give you a picture of the birthday girl and two of her cousins!!!! I can't believe this girl is 3! It has gone so fast! She is an amazing and wonderful little girl!

Tuesday, February 2, 2016

Hot Chocolate Bar Chocolate Stir Spoons and Marshmallows Tips

Anyone want to take a guess at what kind of party I am preparing for? I will give you a hint, it is for a 3 year old girl! 

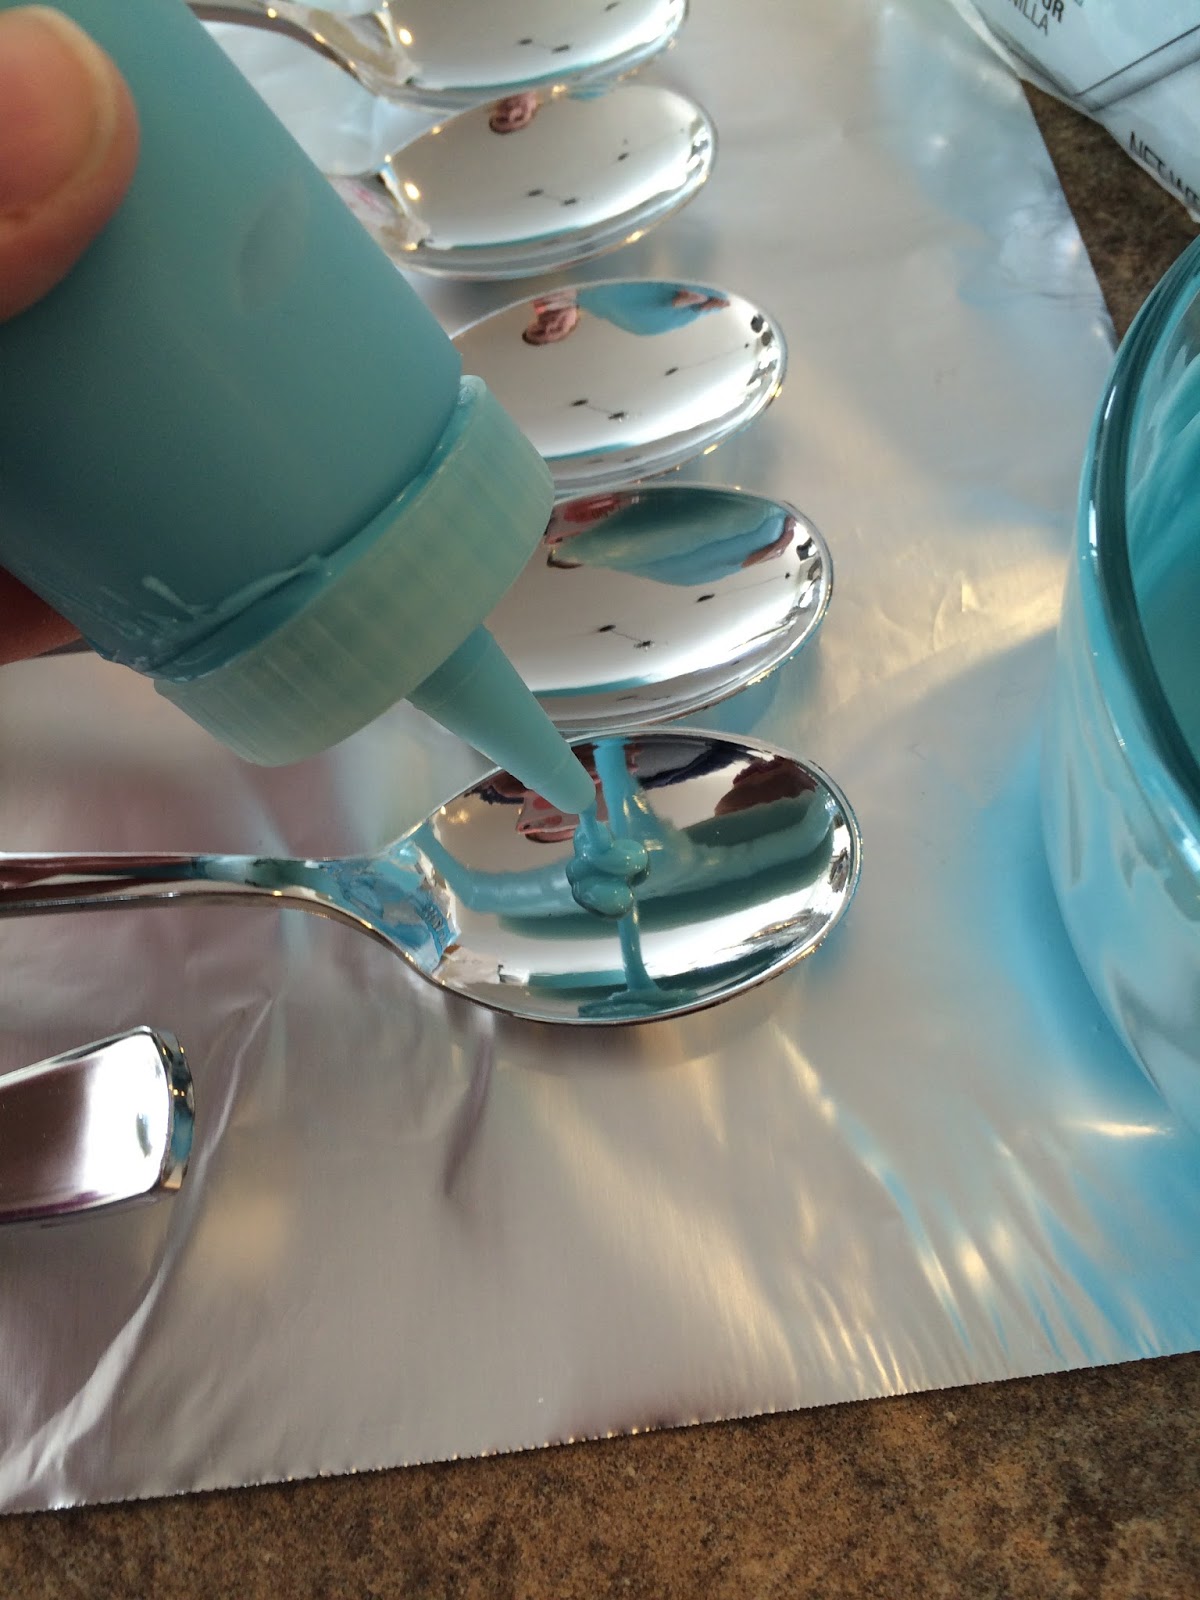
So again this year I am doing a Hot Chocolate Bar, because what birthday party the first week of February would be complete without one!!! I love making the cute toppings for hot chocolate bars, including chocolate covered marshmallow stir sticks and chocolate covered spoons! Not only do they add a nice touch, but they are SOOO yummy in your hot chocolate. 

Aren't these cute plastic metallic spoons, I found them at Target. It works best if you place something under the bottoms of the spoons, to level out the top. 
A squeeze bottle helps to control the melted chocolate.
Sprinkle on toppings, and you are all set, if you can wait long enough for them to harden!
Oh wow looking at this makes me so hungry! The key to dipping marshmallows is making sure your marshmallow is very secure on your stick, as well as using less chocolate than you think.
 You want to do a very fast dip in the chocolate. And you want to let the extra drip off for a few seconds. This is a good amount of chocolate on your marshmallow!
To add sugar or toppings to your dipped marshmallow it works best to sprinkle on the toppings.  I used a spoon over my sugar bowl to add the toppings. This works a lot better than dipping. If you dip, you will get a lot of sugar on the bottom and it will become too heavy!
Completed marshmallows!!! See the marshmallow to the right in the front row, that is what happens when you dip your marshmallow in sugar instead of sprinkling it on like I suggested! It doesn't look as nice because all of the sugar clumped to the side.

Wednesday, January 27, 2016

Organization in 2016

I've decided that I need to become more organized in 2016!! (Among other things!)

In our new house we have a butler's pantry which I LOVE! It's a great space to store extra stuff and to organize bills and other paper work. There is a nice big blank wall which I use to organize our lives. I love this system. It's from Pottery Barn and I got most of it from Craig's List!!!!


We have our bills and to do bins! A pin board - since I don't like hanging things on my fridge!!! It gets too cluttered too fast!!! And the must needed calendar! I use a separate color for each child to try and keep us a bit more prepared.


How do you keep your family organized? I can't wait to get more organized in 2016!!

Friday, January 15, 2016

Painting Stripes Quickly

This is my third time painting striped walls! And I liked how they turned out in Little Man's last bedroom I replicated them in his new bedroom. The difference this time I was I decided I wanted six big stripes instead of eight smaller ones. 


Before I started painting the stripes, I looked for tips to paint stripes quickly, because I needed to finish this project in as little time as possible. We were hosting a house warming party soon and I had a babysitter for my daughter. (She isn't the best helper with painting!) 

I used green frog painters tape and I read some tips that if I used this I could just trust that my lines would turn out crisp. Well since I had such a limited time and was using a dark color on a light wall, I didn't want to take the risk. So after I used a level to get my tape on the wall, I used my base paint (the light blue) and painted right over the tape to seal the tape. I only used this technique on the top two stripes, since the bottom stripe won't be seen with the bed and the shelf. 

After two coats of my dark navy paint (which is my absolute favorite!!!!!) I removed the tape while the top coat was still wet. Since I didn't do the extra bottom coat on the bottom stripe, that was the first one I removed the tape on, and it was horrible!!! The line looked horrible. It had bled so much under the tape I was so disappointed!! And so nervous about my other two stripes. Luckily you can't see the bottom stripe, so it is ok. See below for how much it bled! 


With my fingers crossed, I slowly removed the tape on the top two stripes and they were perfect!!!! So in the long run my extra step of painting the bottom coat did save me time, or I would have spent a lot of additional time fixing the bled. 

So save yourself some time in the long run and do the extra step of painting your base coat over your tape, even if you have the best tape out there!