Monday, April 30, 2012

Wedding Details

With less than two weeks left until my sister's wedding I have a few wedding details on my to-do list!

1. Programs
2. Make a Cake Topper
3. Place cards for reception
4. Place cards for rehersal dinner
5. Sew a garter
6. Sew a bow tie for little man
7. Help with table numbers
8. Collect "vintage" frames for photos
9. Create a 16x20 plus document to guide guests to their correct table
10. Gift bags for hotel guests
11. Wedding day survival kit
12. Bathroom essentials

Hopefully I am not forgetting anything...

Since every post needs a picture... here is a picture of the beautiful bride at her Bachlorette party sporting her beautiful purple veil I made for her and her mustache straw (no we were not drinking wine with straws.....)

Sunday, April 29, 2012

Wedding Season

I love weddings!I love going to them and I love helping to plan them! I would love to be a wedding planner (if anyone needs one, feel free to contact me :) ) My sister Kristin is getting married in 2 weeks, so we are in full wedding planning detail mode at the moment! After all when it comes to a wedding, it's all about the details!

So the next couple weeks will be all about weddings for me! Here are a couple pictures of my other sister Brooke's wedding from March of 2008.

The tables! We made the place cards, made tags for the hot sauce and added ribbon to tons of candles! Isn't wedding planning fun!

Great Garage Clean-Out Challenge

Back in February, I participated in the 29 Day Organizational Challenge (put on by Org Junkie) and organized my Craft Room. It really kept me honest in organizing my craft room and I ended up with a craft room I am very proud of! So when Laura at Org Junkie just announced she is hosting the Great Garage Clean Out Challenge I knew I would be participating!

 So here are the before pictures of my garage. It doesn't look sooooooooo bad in the pictures, but I did try and clean it up a bit last weekend....

Right now we can only park one car in the garage and my husband would like to be able to park his in as well!!!

The nice pile of "stuff" that is making it impossible to park two cars in the garage. Notice there are 2 tan colored chairs that I bought last summer to re-upholster for our living room - since we have no furniture in the room.... This also has a couple wooden chairs, a couple side tables, shoe rack and other random things...
H
We had a nice peg board on our wall, but it's not used as it should. We also for some reason have 2 huge garbage bins which take up so much room. So I need to figure out how to give one back to the city?

We have a ton of storage space on the back wall of the garage as you can see. But the entire right side is pretty much just thrown up there - at leas the bottom shelves. This area really needs to be organized!
We have a Christmas tree... which sat in this spot all winter (AKA we didn't use it for Christmas! On the right we have our over flowing recycle bin and our second garbage bin as well as lots of stuff!

Do you see the small table with the big red W on it?  Well... that table top used to be our beer pong table.... :) from our much younger days.... or before we had kids.... Recently we had little man's second birthday party and I wanted a table for all of the kids to sit at... so the beer pong table got legs, and now we have a kids table... funny how things change!!!! We were smart and the legs just screw off... but that doesn't mean it can't sit in the middle of the garage....
Look at all of those paint cans on the bottom shelf. And the lawn and garden supplies on the second to bottom shelf (99% from the last owners...) We also have ceiling storage that currently holds a toddler bed and a toddler sled!

Seriously so much paint!!!! And so many lawn supplies! All of those bins on the top 2 shelves are my garage sale bins full of things I want to sell at a garage sale this summer!!! (Remember we just moved into our house, so lots of things to purge!!!!)

Seriously these selves are so messy!!! And they really need to be organized.

I am so excited for this challenge because I need to organize my garage!!!  And this is just the motivation I need to do it!!! If you don't believe me check out my craft room transformation!

Side note: I very recently "fixed" our broken garage door. Basically it has not worked since we moved into our house in July (yes we both parked outside for most of the winter, luckily it was a mild winter!!!!) I did try to fix it before and had other people look at it, talked to a garage door repair guy, but I finally figure out the problem last week myself!!! There was a tiny little antenna next that needed to be pointing straight up. Once I moved the antenna it worked fine!!! So that allowed me to park my car in the garage!!!

Wednesday, April 25, 2012

My new fabric

I am very excited to have finally checked out this new locally owned fabric / sewing lounge called The Sewcial Lounge. I was getting a bit bored with the fabric options at the chain fabric stores and enjoyed the different options they had available!

I got these 5 fabrics!!! I LOVE the yellow and gray chevron!!! AND I love the top gray pattern and the blue, gray and yellow pattern to the right!
I am not 100% sure what these pieces will become, but I am excited to have some fun options in my stash!!

I am thinking the gray and yellow chevron will become a pillow!!! AND the gray, blue and yellow one on the right I am thinking new curtains for the dinning room!!! 

I could have spent a lot longer in the store but little man insisted on going home to take a nap.....

Friday, April 20, 2012

Burlap Wedding Shower

 Last weekend we hosted my sister's wedding shower. Since my sister wanted a joint shower with both sides of her future family we decided to have it at a restaurant! After the insane April we have had, it was a great decision! My youngest sister put together this cute towel wedding cake display for our sister. We used burlap circles to decorate the "cake" and a rhinestone hair pin on the top for a little extra bling.

 Since we used burlap on the invites (and I am sort of obsessed with it at the moment) I made a burlap banner. ( I wish I would have hung this a bit higher, but oh well it still looks cute!!)
This was so simple to make. I simply cut out 4 - 5.5 x 5 inch burlap squares. I then made a stencil with my Silhouette (you could easily buy something, or free hand if you like) and used my trusty black acrylic paint to fill in my stencil. Once dried I used my sewing machine to sew the squares together onto a piece of jute. So simple and so cute!!!
 Then I made the Bride and Groom initial canvas artwork for them to use as they wish! I found these great linen canvases at a local craft store. I LOVE the color and love how they are not white but already have that great linen texture!! (I bought 4 more for myself for TBD projects!!! I love them THAT much!!!)

I again used my Silhouette to create a stencil for the letters. (Again you could use other options to achieve this looks!) Again used my acrylic black paint (that's what the label said!!) and created this cute simple artwork!

The last project I created for this shower was the favor. You can't have a shower without a favor!!! I ran to Home Depot and picked up a few packages of Gladiolas bulbs. We then cut and wrapped them in burlap. (See how to cut burlap)  I used a stamp set to stamp the phrase "Let love grow" onto a piece of card stock and included basic planting directions (we didn't want anyone to think it was something to eat.....) and there we have a simple but cute favor to match our burlap themed wedding shower!
The best part about using Gladiolas bulbs is this was my grandpa's favorite flowers. He used to grow these flowers and they really remind me of him!

The whole look!!!

Tuesday, April 10, 2012

I've been MIA and enjoying it!

I've been MIA and enjoying it! Last week I was enjoying a sunny, warm vacation in Arizona. We took the red eye home and got back Friday at 7 am. Saturday was Little Man's big second birthday party (where someone may or may not have gone over board....) then it was Easter and now I am enjoying catching up on sleep and relaxing! I hired a photographer for the birthday party and didn't take a single picture! So I will post the birthday party soon! Since Little Man's party was the day before Easter I did not do a single Easter / Spring project (and was very jealous of all of the cute projects out there!!!) But I did not think that Jesus and Cars mixed all that well. So maybe next year!!!! 

I found myself relieved to not have any craft projects to do today.... so we will see how long that lasts... I give it until tomorrow afternoon!!! After all I do have my sister's wedding shower this weekend so I am sure there will be some fabulous burlap projects I have to do for that!!! 

For now, a picture of the Grand Canyon! 


Thursday, April 5, 2012

DIY Burlap Wedding Shower Invite


Check out these wedding shower invites I created. I saw the concept of "tying the knot" online (I am sorry I don't remember where) but took my own twist on it by using a DIY burlap ribbon. After this project I am annoyed with burlap. It's messy, smelly and very messy!!! We had a major craft fail cutting the ribbon stripes, but luckily I figured it out!! See my How to Cut Burlap post.

Wednesday, April 4, 2012

Silhouette Craft Fail

I don't have a lot of craft fails with my Silhouette Cameo when I use paper.... but this time that was not the case... This was my fault in that I did not press the paper down enough onto the craft mat. One more run in and my project cut just fine!

Tuesday, April 3, 2012

Kitchen Bar Stools Upholstered

One of my most FABULOUS and AWESOME Craig's List finds were 4 brand new bar stools that were un-assembled for ONLY $50!! For all 4! (Seriously might be my best CL deal so far!!!) Target sells ONE similar chair for $70! And these were from a furniture store, but the original owner only wanted the table and it came as a set. So lucky me I am the owner of the 4 new chairs!

When I first bought them I knew I was going to upholster them (they came with a hard wooden seat) and originally I was going to paint them black. I decided not to paint them and am very glad I did not, I like the color as is - plus less work!

Once I had the chairs assembled, I had the very difficult choice of picking which fabric to use! I was debating between 3 fabulous patterns I got while in New York at Mood! (Seriously I want to go back to New York just to go to Mood!!! Such a fun store!!!!) I decided on the pretty grey fabric (the others will be around at some point... just need to figure out one what!!!)

I purchased 2 inch foam square cushions from Joann Fabrics. I debated on the 1 inch but thought that seemed too thin and ended up with the 2 inch. At first it looked like 2 inches was going to be too thick, but I think they turned out great.

I used one square per chair and had some help cutting them out!

Little man had to make sure they were going to be comfortable enough... it is important to test out your hard work before you put in all of the hard work!!

I traced around the seat with a sharpie and used a fabulous orange handled scissors to cut right through the 2 inch foam.

The most important step I did (I don't have a picture of) was to cut a small amount off of the top of the foam at an angle so the seat was not so square looking when covered. I was not neat about it and once the fabric was on and stapled down you could not tell that I was not neat, but it does help to make the upholstery look like it was meant to be there and not something I added on at the last minute! (You can see the curved edge in the final pictures!)

I then found my staple gun and stapled the fabric to the chair pulling the fabric tight without stretching the fabric "pattern." I also had help on this step! But this time little man thought it was fun to jump off of the chair seat.... I guess the extra foam gave him more lift...

I made sure to do my front corner the same on each chair so they would look consistent - the back on mine did not matter as much because that part was screwed into the base!
Then I screwed the seat to the base and we have fabulous new bar stools!

I love how they turned out and the fabric I decided to use! We have used these stools every day for the past 3 plus months and they still look just as good as they did when I made them.


Monday, April 2, 2012

DIY Train Table

For Christmas Little Man got a homemade train table made by grandpa. My dad made Little Man this train table based on the directions from Ana White. I know he made a few tweaks, but I don't know what they were.... I made the mistake of letting Little Man play with the table before it was painted and I was not sure how I would ever be able to get the time to paint it without disrupting play time.... but I found the time! And Little Man was even more excited to get back his table!!

The pouf I made for the table works great! The navy bins my mom purchased from Pottery Barn Kids. My dad was going to make the wooden bins, but my mom found these on sale so we just got them instead.

I love the knock off of this table and Little Man loves LOVES LOVES the train table "ba pa" made him!

Sunday, April 1, 2012

Happy Birthday and Birthday Printable

Happy second birthday Little Man!!! I can't believe my little man is 2!!!! It's been an awesome fabulous 2 years, but its gone SOOO fast!!!!

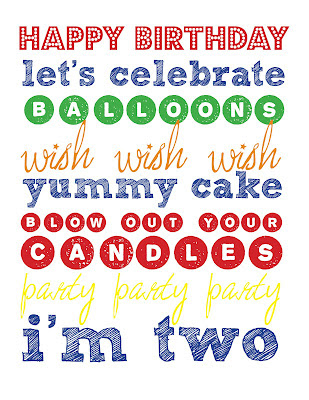
In honor of little man's second birthday here are 2 birthday printables for your enjoyment!

They are both 8x10 but set up on a 8.5 x 11 paper (just cut once printed)!

Right click on the image to save it!!!

This is the one I made for Little Man's party.
And in case you want it for someone NOT turning two :) here is a generic version!! Enjoy!