Tuesday, August 30, 2011

DIY Jewelery Storage


When I saw these great jewelery frames, I knew I needed to make one! I love the idea on being able to see my necklaces when getting ready!

One day on a Goodwill trip, I found a nice sized frame (stained a natural color) and these 2 cork boards that fit perfectly in the frame! I spray painted the frame white! And stapled the cork boards together and was ready to upholster!


I found this great gray fabric that I loved, and combined it with some batting. This was my first time upholstering something, and was it easy!


It's not the best finish on the back, but it's the back!


I tried to find cute pins to use to hang my necklaces, but I could not. I ended up using small nails and hot gluing little pearls I bought in the Scrapbook isle.

Here is my finished piece! I have these great little glass scones I hung up in our bathroom that I was not sure what I would put in them, but my really long necklaces look great in them!! You can also see in this picture my storage for my nail polish, an apocrathy jar.


Linked to these parties.

Wednesday, August 17, 2011

Toy Storage with DIY Chalkboard Tags

In order to try and keep my son's playroom as organized as possible, I bought several canvas totes from Target that were pretty boring. So I decided to make little chalkboard (my latest obsession!!!!) labels for them. Super easy and now we have an organized (for now) toy room!


At Micheal's I bought little wooden boards meant for flags for 29 cents a piece!


I gave them 2 coats of Rustoleam Moonstruck Chalkboard paint!


Ready to attach my chalkboard tags to the canvas. My first time using Liquid Nails!!


A nice drizzle of Liquid Nails.


Just placed them on and let them dry!


The finished product.

So organized! All of my canvas totes in our IKEA LACK shelf.


Saturday, August 13, 2011

Kitchen Chalk Board Wall

By our garage door and kitchen, we have this small wall that as soon as I saw it, I knew it would be perfect as a chalk board wall!

I used Rustoleum Tint Base Chalk Board Paint which I had the paint counter tint to Coffee.
This was my first time using the Chalk Board paint. I was a little nervous at first, but I am very happy with the final product. It actually took me more coats than I thought it would. I put a good 4 coats on to get the dark brown paint to look consistent.


I am so happy with how this wall turned out! Since this wall I have bought 5 more cans of this paint for various projects in my son's playroom!!

Friday, August 12, 2011

Dining room chairs

These are the very pretty new chairs I am in the process of re-doing for our dining room chairs. I liked their shape and their smaller size, but they are taking a lot longer than I thought to re-finish! I just love the fabric seats!


My goal for the weekend is to finish these chairs!! We will see if I can met this goal!

Thursday, August 4, 2011

Playroom fabulous table and chair set

I am in the process of decorating my son's play room in bright primary colors. When we moved into our new house, the previous owners left a slightly boring table and chair set (for some reason there were only 3 chairs). Figuring I had nothing to loose, I had fun with the spray paint!! I LOVE how it turned out and I think it looks great in the soon to be finished bright primary color play room!


I did not take a picture of the whole set, but here is a before of one of the chairs. Some of them were in better shape than others. There were a few paint splatters on the chairs as well.


I primed the chairs. At one point I was thinking of painting all of the chairs white and painting the table a bright color.

I love how bright and happy the chairs turned out!


I forgot to take a before of the table, but you get the point. I primed the table and gave it a nice coat of bright blue!


I am so happy with how the table and chairs turned out! I can't wait to be done with the entire play room! It's going to be a fun and bright place for my son to play!

Monday, August 1, 2011

DIY Nursery Mobile

For Little Man's Nursery, I wanted a cute mobile that matched his room, but could not find anything I liked. So I made my own!!


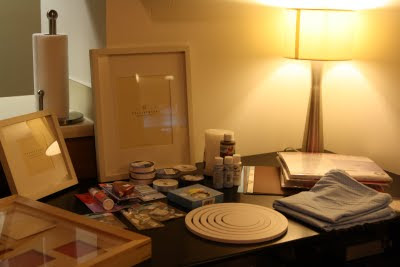
One night after work, I roamed the craft store for probably 3 hours looking for anything fun that I thought I could use in Little Man's room! While there I found these great wooden circles that were sold in sets of 6 nesting circle rings with a solid 4 inch circle in the middle. They came white, so I snagged about 4 packages of these circles!

These are all of my supplies, plus one set of the white rings in the center of the table. (For my DIY mobile I only used these circles, ribbon and the acrylic craft paint in this picture!)Here are my circles painted with a first coat of blue paint!
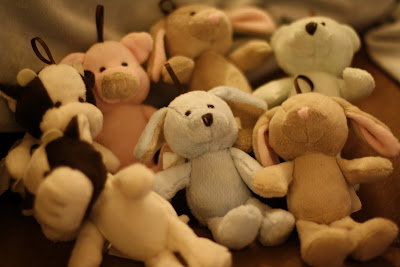
To make my personal mobile, I found these cute little characters that were the same colors as the bedding I bought for the room. These were on super sale because they were considered Christmas ornaments, so they were way off season! I just looped the little animals onto the mobile so in the future if I want too, I can easily remove them from the mobile and they are not ruined!

I wanted the mobile to be sturdy, since it would hang above Little Man's crib. So I used a small nail to tack the ribbon in place. I tried glue, but that was not working as I hoped, so I found the nails worked the best. To hang the bears, I used little hooks and screwed them into the wood.

This is my finished mobile with my painted circles on the wall! To paint the circles on the rings, I traced a button with a pencil and free handed them!