My top 2012 posts are as follows:
DIY Burlap Wedding Shower Invite
Red Envelope Knock-off Artwork
Craft Room Reveal
Chevron Curtains
And my most popular post of 2012 is my DIY Pouf
I can't wait to share my projects in 2013! Happy 2013 to everyone and thanks for reading!!
Showing posts with label Red Envelope. Show all posts
Wednesday, January 2, 2013
Monday, May 21, 2012
My Gallery Wall
So I finally finished my Master Bedroom Gallery Wall. It has been done for a while - well mostly - and I finally got around to posting it.
I am happy with what it looks like so far. I am sure at some point I will add to it, but for now it's a great start. And most importantly it's adding something fun to our pretty boring master bedroom.
Below is a run down on some of the pieces included in the gallery wall,
1. Is a plaque we got as a wedding present almost 7 years ago! It fit perfect with my wall.
2. I spray painted this Red Envelope larger frame that was originally meant for a shadow box. I created a mat for the frame by using foam board and a shower curtain to create an 8x10 opening.
3. A burlap background with a big H!
4. This is my favorite. I spray painted the frame and used leather from a leather skirt I wore the day my husband proposed to me as the background. I loved the skirt at the time but it is no were near close to something that will fit me so this is the perfect way to see it and remember that special day!
5. I created a heart out of buttons onto cardboard. The buttons are shinny and add nice dimension to the gallery wall.
6. I made myself some state artwork that I previously made based on the Red Envelope state art
I really like my button heart. I also really like that I could include the skirt I wore when I got engaged! I love the meaning it adds to our room.
The entire gallery wall was put together using Command Adhesive. I LOVE this stuff! It works great for a gallery wall like this because it can easily be changed in the future without having lots of holes to repair.
Tuesday, January 17, 2012
Knock Off Decor
I am so excited that I have been featured on Knock Off Decor for the SECOND time!!
Thanks again Knock Off Decor!

I love this site and am so happy to be featured on it! Check it out, so many fabulous knock offs!

My most recent project to be featured was my Red Envelope knock off canvas art!
In November my Dr. Seuss Bathroom was featured. This bathroom was a lot of work - and I actually painted those fish! But I am so proud of this bathroom and Little Man still loves pointing out all of the fish each time he takes a bath!


Thanks again Knock Off Decor!

Friday, January 13, 2012
Red Envelope Knock-off Artwork
I love Red Envelope for their unique gifts. I have bought and received my share of things from Red Envelope but recently when exploring their website I came across their personalized canvas art work starting at $120. While I would have no problem purchasing a personalized canvas for that price but these are SO simple looking that I figured I could easily make them myself for a fraction of the price.
I LOVED the state canvas! So cool! But so easy to make! (For some reason this was really hard to photograph - the state looks pink.... it's not, it's white!!!)

I searched the internet for a state of Wisconsin image and I found a pretty simple one. If you can't find a simple shape you can use the directions I used for making a silhouette of my son in photoshop.
To cut the state shape with the Silhouette, I saved my image as a JPG and opened it in Silhouette studio. In the trace menu I selected my entire image with the "select trace area" and then selected "trace outer edge." I then re-sized mine to be about 12x12 since I was using a 16x20inch canvas. Then it was off to the cutting machine!

I then transferred the state and words to the canvas.

I then piled on the white paint to try and seal the vinyl to the canvas. I actually did two light coats and it did NOT bled.

I then painted several layers of Martha Stewart's Surf craft paint.

I did let it dry over night so it was good and dry. I know some remove the vinyl when wet, but I figured it would be easier to remove the large state image when dry since its so large! I was so nervous pealing the letters off!

But it turned out GREAT! I love it! I love the detail that the Silhouette cut out for the state border!

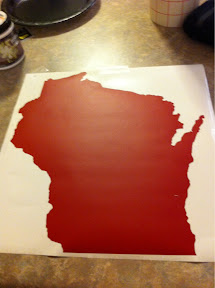
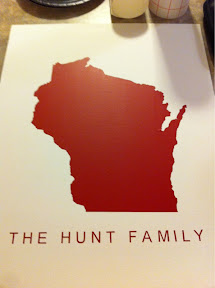
I think it turned out great! Here is the original from Red Envelope for $120!
While browsing the Red Envelope site I came across this pretty canvas that will go well in my guest bedroom! Again $120!
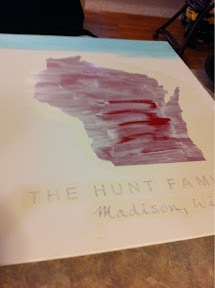
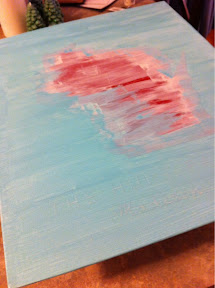
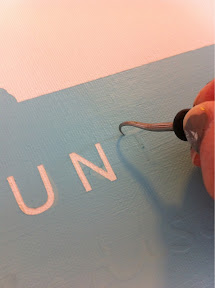
Well here is my version. So simple I just used my Silhouette again. And this canvas I have had for about 5 years and re-painted over it the dark gray not knowing what I would use it for! So this was a pretty near free project for me! This canvas is about 15x30 inches and I love how large the canvas is and how there is so much extra space on the top and bottom!


I then piled on the white paint to try and seal the vinyl to the canvas. I actually did two light coats and it did NOT bled.


Labels:
art work,
canvas,
Knock Off,
Red Envelope,
silhouette,
stencil
Subscribe to:
Posts (Atom)