Friday, January 13, 2012

Red Envelope Knock-off Artwork

I love Red Envelope for their unique gifts. I have bought and received my share of things from Red Envelope but recently when exploring their website I came across their personalized canvas art work starting at $120. While I would have no problem purchasing a personalized canvas for that price but these are SO simple looking that I figured I could easily make them myself for a fraction of the price.

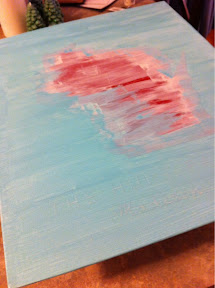
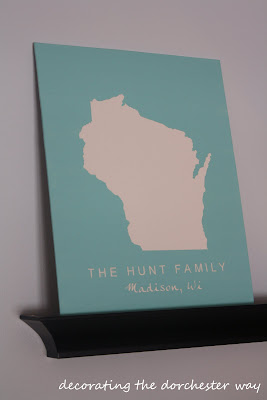
I LOVED the state canvas! So cool! But so easy to make! (For some reason this was really hard to photograph - the state looks pink.... it's not, it's white!!!)
I used my Silhouette Cameo to make state of Wisconsin and the text.

I searched the internet for a state of Wisconsin image and I found a pretty simple one. If you can't find a simple shape you can use the directions I used for making a silhouette of my son in photoshop.

To cut the state shape with the Silhouette, I saved my image as a JPG and opened it in Silhouette studio. In the trace menu I selected my entire image with the "select trace area" and then selected "trace outer edge." I then re-sized mine to be about 12x12 since I was using a 16x20inch canvas. Then it was off to the cutting machine!
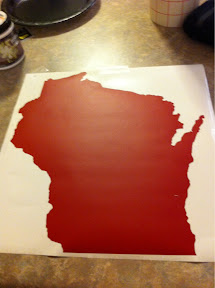
I then transferred the state and words to the canvas.

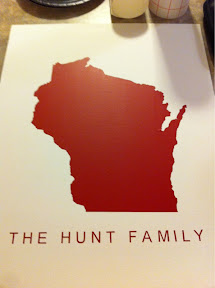
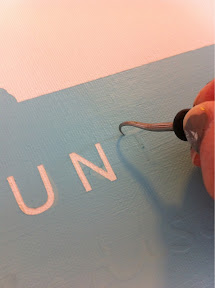
I then piled on the white paint to try and seal the vinyl to the canvas. I actually did two light coats and it did NOT bled.
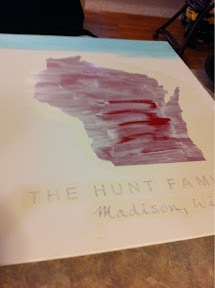
I then painted several layers of Martha Stewart's Surf craft paint.
I did let it dry over night so it was good and dry. I know some remove the vinyl when wet, but I figured it would be easier to remove the large state image when dry since its so large! I was so nervous pealing the letters off!
But it turned out GREAT! I love it! I love the detail that the Silhouette cut out for the state border!
I think it turned out great! Here is the original from Red Envelope for $120!
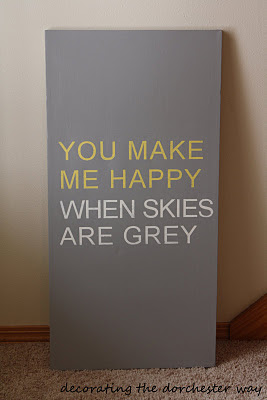
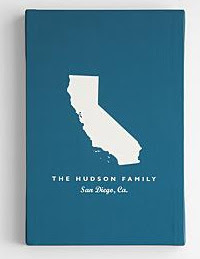
While browsing the Red Envelope site I came across this pretty canvas that will go well in my guest bedroom! Again $120!
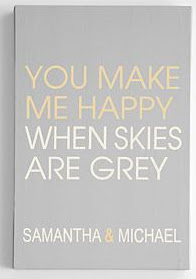
Well here is my version. So simple I just used my Silhouette again. And this canvas I have had for about 5 years and re-painted over it the dark gray not knowing what I would use it for! So this was a pretty near free project for me! This canvas is about 15x30 inches and I love how large the canvas is and how there is so much extra space on the top and bottom!

Thursday, January 12, 2012

Traveling with an infant on Amtrak

This is not craft related, but for a while now I wanted to blog about my experience taking Amtrak with an infant because before we set out on this trip I searched for others experiences and was not able to find very much information.

So if you do not care to know about traveling 56 hours on an Amtrak train with a child, feel free to stop reading!
Last August we took Amtrak to Whitefish, Montana for my cousin's wedding. We actually traveled with a large group of my extended family. My husband was not able to attend, but we had lots of help with my sisters and of course grandma and grandpa!

At the time of our trip my son was 16 months old. And I would say over all it was a VERY positive experience. (Well as much of a positive experience as you can have being stuck on a train 28 hours one way!! Lets just say the 16 month old was not the reason for any issues with the trip - 56 hours is just a LONG time to be on a train!!!)

I should mention I have taken Amtrak several times with my son before (by myself!) but only on a 6 hour trip.  I could go into a whole extra tangent here - but  I will just say dealing with a transfer by yourself is a bit challenging because unlike an airplane you are carrying the baby AND your luggage (backpacks are good for luggage when you are by yourself!!) But other passengers and the Amtrak staff (usually) are very helpful with helping you out when you are by yourself with a baby.

We did NOT have a roomette for our 56 hour trip, and honestly I don't think it would have been any easier with one. It might have been more difficult with one, but I was not in one, so I can't say for sure. I just know we did not have one and it worked out very well for us.

Sleep
The biggest question I had before hand was were is a 16 month old going to sleep and how is he going to sleep and stay asleep without having a total meltdown. I thought about lots of different options including bringing his stroller and having him sleep in that, his pack and play (which is small, but would have NEVER worked!) When he was little and still in his bucket seat it was perfect, he slept anywhere! My plan before getting on the train was to bring his car seat along (which we then also used in the the rental car) and bring a bungee cord along and attach his car seat to the train seat (since train cars do not have seat buckles.)


Once on the train we just put his car seat on the floor in front of our seat and made sure to put a bag or something behind the seat so it would not tip over! (It did make it impossible for 2 people to sleep in the seats but we technically had a seat for the 16 month old.) On the way there we were in the first row, which has a little more room than the rest of the seats. I was still nervous about how he would sleep, but he slept better than anyone else! Once he was in his seat (we did buckle him in his seat) he slept great the entire night! We made sure to have familiar things for him - his favorite blankets and stuffed animals (Bring a blanket for everyone in your party!! Then train gets COLD!!! Trust me!! And socks!!!! It's cold!!) When not in use, we stored the car seat away from our space to have a bit more room.

Eating
Next how to feed a young child on the train. I would suggest bringing along a lot of child friendly snacks. There is a food car, but there really is nothing a 16 month old would eat. We brought a cooler with milk for him and easy to transport snack food items - string cheese, fruit cups, yogurt, crackers, cereal... you get the point. We brought along 4 sippy cups for him as well and washed them out once we were in our hotel for the return trip. We also stopped at a grocery store before our return trip to refill our food supplies! HINT: bring along a bottle of your favorite wine or beer as well! They sell some alcohol in the snack car but its expensive and you can drink in your seat (just don't forget a wine opener!)

Entertainment
This was not as hard as we thought it would be, but we were very prepared! We brought along NEW toys which helped. My son loves cars and I would suggest bringing several of them! They are easy to play with on the tray tables. Here we are making a new friend!


We brought new things and even a few toys that were for older children, but we knew he would be very closely supervised so that was not so much of an issue. A few new books, crayons, even a train car and a Thomas the Train flash light! (He loved that!) We also brought stickers, which were fun to put on the windows of the train! Here we are in the observation car. I highly suggest making the trip to this car often. There are larger windows and a bit more space to enjoy the views, which kept us entertained for hours!

In general for our trip we over packed! (Since we were going to Montana we brought a back pack carrier to go hiking with.) Because we were part of a big group we were able to leave our luggage under the train (if you get on at a hub station you should also be able to do this) or you can leave your luggage at the front of the train for a bit easier access. Make sure to pack a "carry on" bag so it's easier to find all of your necessary items.

Misc Items
My son loves his paci so I packed EVERY single one was had just in case!

Seriously, make sure to bring socks and a blanket! Bring a sweatshirt or something for everyone as well, it does get chilly even in the summer!

Bring lots and lots of wipes! I over packed on these (and diapers!!) but I would rather have extra than run out! Plus the wipes come in handy for cleaning up after eating and so many other things!

So would I do it again? Yes, it was not that bad. It was a long time to spend on the train, but we were prepared so it made it easier. I have heard stories of the train being delayed... if that would have happened to us, I might have changed my story, but it was not so bad! Plus the views were AWESOME!!!! So that may have helped as well!

Thanks for reading and let me know if you have and questions!!

Wednesday, January 11, 2012

Sewed Ribbon Chevron Pillow

I added to my home decor my first chevron piece! I created a chevron pillow with fabric and white grosgrain ribbon and I love how it turned out!

chevron ribbon pillowI was not sure how long this would take to make and it was my second project with my new sewing machine that I am still trying to figure out. It took less than 2 hours and would have taken less had I not had issues with my sewing machine (still not sure if its the machine or user error :) )

My pillow ended up being a 16 x 16 inch square pillow.

I first started by measuring and marking my ribbon every 4 inches, to account for the seam allowance I did the first one in 4.25 inches - which I really would not have had to do, but I did. (Do you like my snowman PJs in the picture :) )


chevron ribbon pillow
I decided to sew the ribbon every 2 inches for a total of 8 rows.

For my first row I used tape to mark the top and to mark the bottom (I added an extra .5 inches on the bottom again for seam allowance.) For the remaining rows I did not use the tape as it was not necessary and made the edges tear a bit.


chevron ribbon pillow
Originally with adding the tape I thought I would not have to pin the ribbon, but after I started putting it together I found the tape was not needed, but the pins were a must! Much easier!


chevron ribbon pillow

Time to sew! I sewed right down the middle of the ribbon (or as close to center as possible! - I'm a new sewer!!)


chevron ribbon pillow

For the second plus rows, I used my acrylic ruler and placed it 2 inches above the starting point of the first line and sort of eyeballed where the ribbon should go, using the first row for the bottom points. I found it worked best to pin a row and sew it before pinning the next row.


chevron ribbon pillow

More sewing! I found the easiest way to sew the angle change was to make sure the needle was down in the fabric, lift the foot up and turn the fabric with the needle down in the fabric. I am sure this is a basic sewing concept, but I am a new sewer!


chevron ribbon pillow
8 rows later, the front of the pillow is complete!


chevron ribbon pillow

I then sewed a basic envelope pillow.


chevron ribbon pillow

Finished product! Love it in person!!

chevron ribbon pillow
chevron ribbon pillowIt looks great in my master bedroom. Here it's sitting on top of the first pillows I made with my new sewing machine. I might make too many pillows.... can you have too many pillows?

chevron ribbon pillow chevron ribbon pillow 
Visit thecsiproject.com

Tuesday, January 10, 2012

My 10 Dollar Book Ledges

I loosely made these red book ledges based on Ana Whites Ten Dollar Ledges. I intended on following these instructions but forgot to take along the sizes to Home Depot when I went so I guessed. I had the friendly Home Depot employees cut the pieces for me and my dad did the hard work of putting them together. I painted them with left over bright red paint I had!
Since they are covered with books I just screwed them directly into the wall making sure to hit a stud since they look a lot like a ladder to my curious toddler!
The finished product!! Since I got a Silhouette for Christmas (well I gave myself a Silhouette for Christmas) I might add some words to them to complete the look! We love the finished look and anything this easy and cheap to store the hundreds of books little man has is awesome!!

Monday, January 9, 2012

Let the sewing begin!

I finally set up my new sewing machine I got for Christmas! I started small with what I know and made a pillow!
I have only ever used my mom's sewing machine which is older than I am! So I am excited for this new machine! Thanks Santa!!!

Thursday, January 5, 2012

Orange and Blue Baby Shower

Before Christmas I hosted a baby shower for my husband's cousin's wife who is expecting their first little boy any day now!! We are very excited since this will be a little boy for our little man to play with since all of his cousin's that live close to us are girls! So we are excited for a boy cousin!

I put together an orange and blue baby shower for her with elephants here and there. Of course I did not get a lot of great shots of all of my work for the party! I was frantically cleaning at the last minute!! So I had to take pictures once the guests arrived....

I made my first cake balls. They were very good, but very sweet! I wrote "baby e" with dark chocolate on the plate.
I love making cupcakes! And these have lots of frosting on them! I did not get a good picture, but I made the little orange candies on the top of the cupcakes which are in the shape of elephants!!
Instead of a guest book, I bought a Horton Hears a Who Dr. Seuss book and had the guests sign it for the mommy to be to read to little baby e!
A wreath I made for decorations! I LOVE these colors!! I hope to use them again soon!
I made a cute banner with an elephants and hung it on the mantle! I also decorated three paper cones with fabric, felt roses and ribbon.
I made the mommy to be 3 tie onesies. I love the little man look and nothing is cuter than a little newborn baby boy wearing a tie!! I hung these cute little onesies from blue clothes hangers I painted on orange string!
I love the orange and blue combination and need to use this combination again very soon for a party...

Wednesday, January 4, 2012

Subway art sans Silhouette


Hi! My sister Angela asked me to write a post about my recent diy project.

I love the look of a vintage or distressed subway sign. There are a lot of cool ones on etsy and I saw one at Restoration Hardware that I really liked, but they were VERY expensive. I knew with my new love for spray paint and saws that I could figure out a way to make my own and personalize it.

I searched pinterest and blogs for ideas to make my own subway sign but kept running into the same problem, pretty much all of them used a Silhouette or Cricut, which I don't have. I read another blog that printed the letters on printer paper, cut out the letters traced them onto contact paper and then cut out the contact paper letters, which seemed like way too many steps for me.

I found full sheet sticker paper that I could put in my ink jet printer. Since I knew I had to cut the letters out I looked for a font in Word that had a lot of straight lines, I went with Impact.

I chose different street names in my neighborhood and printed them in small, medium and large sizes, depending on the length of the name. Then I went to Home Depot and bought a small piece of ply wood for about 8 dollars. I put 2 coats of Rust-Oleum Heirloom white spray paint on the wood and once it dried I played around with the placement of the letters.

I liked the height of the ply wood but I knew my words would look too stretched out with the current width of the board. Enter SAW! Ok, well that's a little dramatic, I just drew a line and cut a few inches off the side.

Next it was time to stick the letters to the board. I tried to keep all of the words centered on the board and just eyeballed the vertical spacing, I took my time on this because once the sticker was on the board I would likely ruin it if I tried to peel it up.

Right before I started spray painting I ran my finger over the letters to make sure they were secure. Then I sprayed it with two coats of Rust-Oleum flat black paint.

Once it is dry, the fun begins...peeling off the stickers!! Some of the paper will stick to the wood, I learned the second time I did this that an eraser is the easiest way to remove the little pieces left behind.

Next I sanded the edges and in between some of the letters and hit it with a hammer a few times to distress it. Then I took a little dark brown stain on a paper towel and rubbed it over the sign, a little bit went a long way. After the stain dried I finished it off with a little spray polyurethane.


I'm really happy with how it turned out and I love how it looks in my living room.

I made this one for my sister who lives in Milwaukee. She went to school at Marquette so I included streets running through campus, streets that she used to live on, as well as the street she currently lives on and any street that fit on the board. The second one was easier and more fun to make because I wasn't nervous that it was going to be a diy disaster.